
I love cupcakes and I get requests from the family to bake cupcakes on a regular basis. My problem is I am a very lazy baker. I hate sifting flour, I hate beating this, and adding that in little portions, and then whisking between additions, which is why I absolutely love Nigella Lawson’s book “How to be a Domestic Goddess“. It has recipes that require little effort, and advocate combining all ingredients at once, rather than the fussy method, and if there is a bit of fuss required, she apologises to the cook!
And the only reason I bake….. Is to ice the cupcake! Now that is the bit I enjoy. A bit like art. I don’t always enjoy the drawing part. If I’m doing a drawing specifically like the recent studies of hands and feet, or portraits, then yes, I love drawing, but if I have to draw or sketch something to paint, then ugh! Drawing becomes a means to an end, and I’m impatient to get it done, because its actually the painting that excites me, just like icing the cupcake!
For those, who like me get irritated with the laborious process of baking here is Nigella’s easy peasy cupcake recipe!
INGREDIENTS
Makes: 12 cupcakes
METRICCUPS
- 125 grams self-raising flour
- 125 grams caster sugar
- 125 grams soft unsalted butter
- 2 large eggs
- ½ teaspoon vanilla extract
- 2 tablespoons milk
- 1 packet instant royal icing
- food colouring (for preference colour pastes)
- cake decorations (wafer roses, sugar flowers, sprinkles, or your favourite sweets/candies)
METHOD
- Preheat the oven to 200ºC/180ºC Fan/gas mark 6/400ºF and line the tin with the muffin cases.
- It couldn’t be simpler to make cup cakes: just put all the ingredients except for the milk in the processor and then blitz till smooth.
- Pulse while adding milk, to make for a soft, dropping consistency, down the funnel. Or using a bowl and wooden spoon, cream the butter and sugar, beat in the eggs one at a time with a little of the flour.
- Then add the vanilla extract and fold in the rest of the flour, adding the milk to get the dropping consistency as before. (I don’t even do this step and they turn out perfectly every time. They only thing I do is add the milk last).
- I know it looks as if you’ll never make this scant mixture fit 12 bun cases, but you will. I promise you this mixture is exactly right to make the 12 cup cakes, so just spoon and scrape the stuff in, trying to fill each case equally, judging by eye only of course.
- Put in the oven and bake for 15-20 minutes or until the cup cakes are cooked and golden on top. As soon as bearable, take the cup cakes in their cases out of the tin and let cool, right way up, on a wire rack.
- Once they’re cool, make up a big, uncoloured batch of royal icing, and then remove a few spoonfuls at a time to small bowls.
- Using a bamboo skewer, add small dots of colours from the paste-tubs, stirring with a teaspoon and then adding more colouring, very slowly, very cautiously (pastel works best here, whatever your everyday aesthetic) until you get the colour you want.
- Use teaspoons to coat the cupcakes with icing and leave each a moment to dry only slightly, on the surface, before sticking on a rose, daisy or whole stash of decorations.
We have just completed some renovations and Siobhon’s room which was one of the areas renovated needed some funky colour on the wall to go with her new work station. Vonnie loves cupcakes, and is always stealing them before they can cool down properly drastically reducing my quantities, or sticking her now adult fingers into my icing mixtures. The natural choice for her wall was of course, cupcakes. Most of all I enjoyed icing these particular cupcakes very much!!!!


Rich chocolate red velvet cup cake with pink cream cheese frosted icing, drizzled with chocolate, and a fresh juicy raspberry on the top.


Vanilla Cupcake with vanilla butter cream icing with a plump sticky glace cherry on the top.


Vanilla cupcake with Vonnies favourite purple icing and colourful sprinkles to top off the bright effect.
I haven’t decided if I will frame them as single pieces or a group. I will chat with my framer before making that decision, as how they are framed will depend on what is best for the particular wall space Vonnie will be hanging them on.
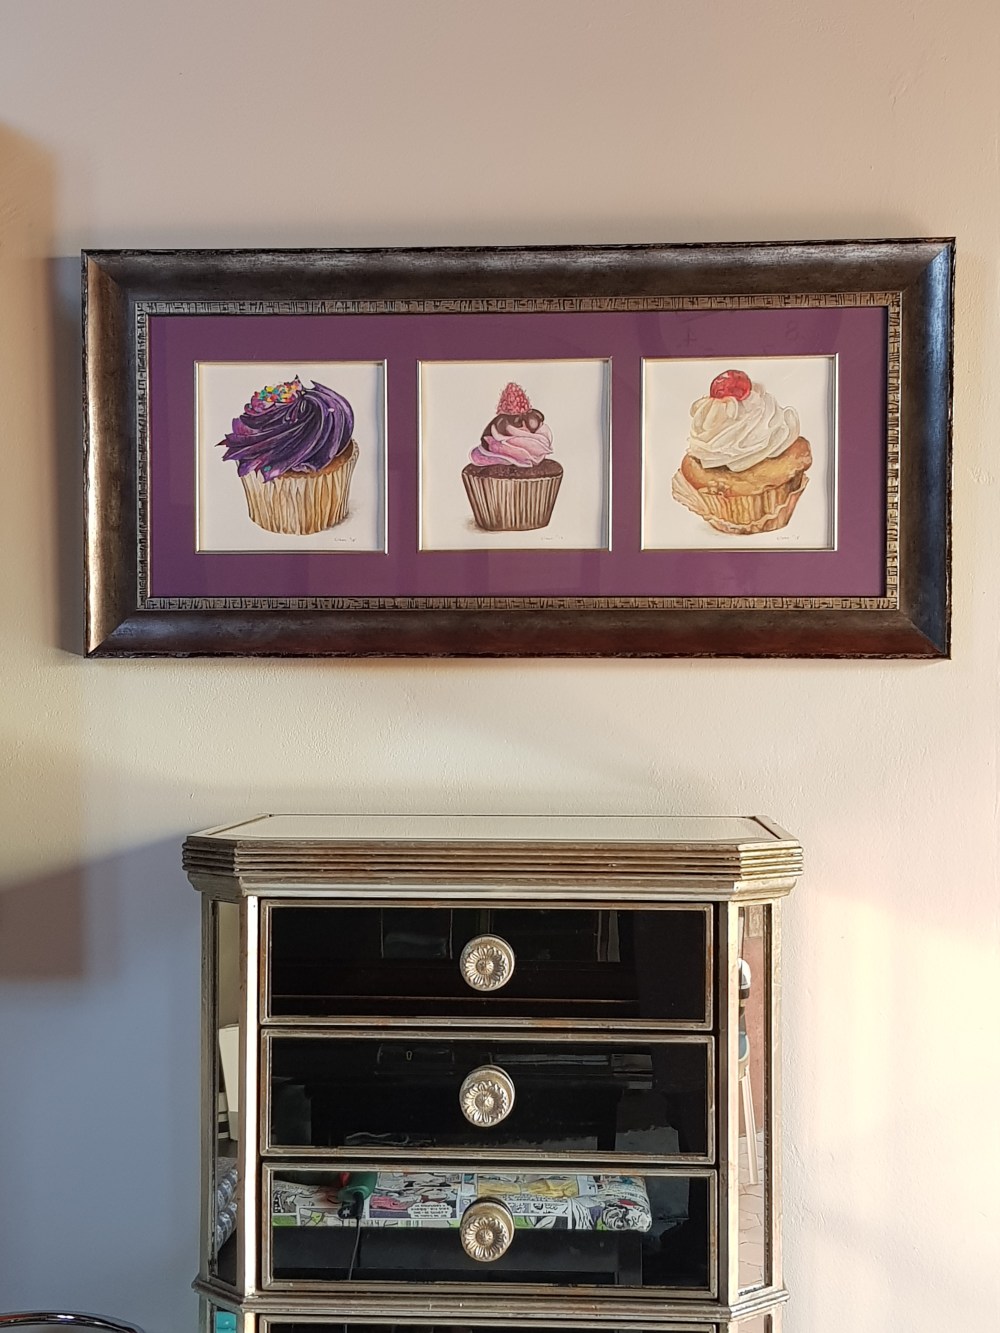
We finally had the cupcakes framed. Vonnie selected the purple border, which I was initially dubious of, but it’s going to hang in her bedroom so had to be her choice. The end result worked really well, as it picked up the purple, and the more subtle mauve / purple shades in all 3 cupcakes. The small silvery frames around each cupcake together with the antiqued mirror effect broader frame pick up all the reflective qualities of the mirror below. It is the perfect compliment to Vonnie’s mirrored chest of drawers.
